
 By admin

A well-planned garage workshop layout can transform an ordinary garage into a functional, comfortable, and efficient workspace. Whether you use your garage for woodworking, automotive repairs, DIY projects, metalworking, or general home maintenance, the right layout helps you organize tools, maximize available space, and complete projects more easily.
A poorly designed workshop can create unnecessary movement, limited working space, cluttered surfaces, and safety problems. Tools may be difficult to reach, equipment can block walkways, and large projects may become challenging because there is not enough room to work.
The best garage workshop layout is designed around your activities, available floor space, equipment, and storage requirements. You do not necessarily need a large garage or an expensive renovation. With thoughtful planning, even a compact garage can become a productive workshop.
In this guide, you will discover practical garage workshop layout ideas, different floor plan options, workbench placement tips, storage arrangements, and space-saving solutions for creating your ideal workspace.
1. Plan Your Garage Workshop Layout Before Starting
Before installing cabinets, purchasing equipment, or building a workbench, evaluate the available garage space.
Measure the length, width, and ceiling height of your garage. Identify doors, windows, electrical outlets, water connections, and other permanent features that may affect your layout.
Next, consider how you intend to use the workshop. A woodworking workshop needs space for cutting, assembling, and storing lumber, while an automotive workshop requires room for vehicle access, tool storage, and equipment movement.
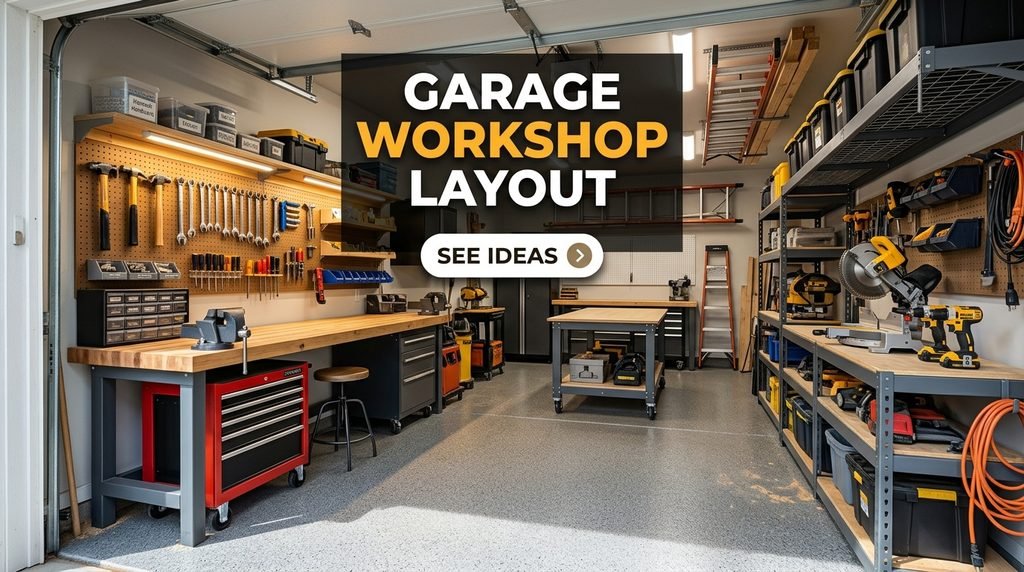
Make a list of your essential equipment and estimate how much space each item requires.
Consider these important planning factors:
- Available floor space
- Workbench dimensions
- Tool storage requirements
- Equipment placement
- Vehicle parking requirements
- Electrical outlet locations
- Lighting and ventilation
- Safe walking paths
- Material storage areas
A simple drawing of your garage can help you visualize where everything should go before making expensive changes.
2. Single-Wall Garage Workshop Layout
<escape> </escape>
A single-wall garage workshop layout is an excellent option for small garages where you need to preserve most of the floor space.
In this arrangement, the workbench, cabinets, pegboards, and shelves are installed along one wall. The remaining area stays open for movement, vehicle parking, or larger projects.
This layout works particularly well for homeowners who use their garage for occasional DIY repairs and general maintenance.
Recommended arrangement:
- Install a workbench along the main wall.
- Place a pegboard above the workbench.
- Add wall-mounted cabinets for tools and supplies.
- Keep frequently used equipment within arm’s reach.
- Install shelves near one end for storage containers.
A single-wall setup is simple to maintain and can be expanded gradually as your workshop requirements increase.
3. Two-Wall Garage Workshop Layout
A two-wall garage workshop layout uses two walls for separate activities. It provides more storage and workspace than a single-wall design while keeping the center of the garage relatively open.
For example, one wall can contain the main workbench and hand tools, while the opposite wall can hold power tools, cabinets, and material storage.
This arrangement is useful for medium-sized garages and workshops where multiple activities take place.
You can organize the space into two main zones:
Wall one: Workbench, pegboard, measuring tools, hand tools, and small parts organizers.
Wall two: Power tool cabinets, shelves, rolling carts, and larger equipment.
Make sure the distance between both walls allows comfortable movement and enough room to handle materials.
4. U-Shaped Garage Workshop Layout
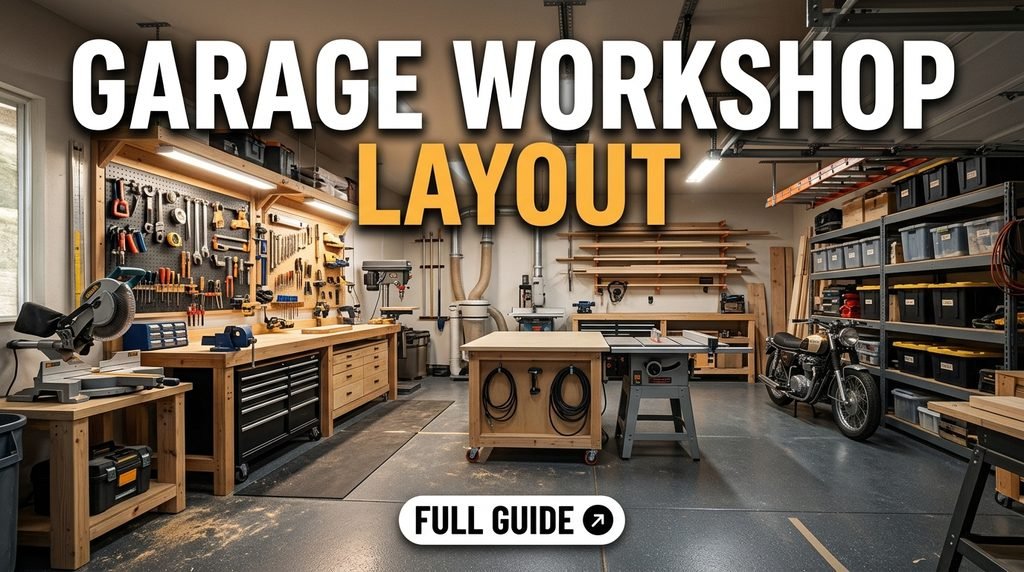
A U-shaped garage workshop layout uses three walls to create a dedicated workspace around an open central area.
This design provides convenient access to tools, equipment, and storage from different directions.
One wall can contain the primary workbench, another can hold power tools and machinery, and the third can provide storage for materials and accessories.
A U-shaped layout is particularly suitable for larger garages where you want a more permanent workshop environment.
Its biggest advantage is that most equipment remains within a relatively short distance of the central working area.
However, avoid filling every wall with deep cabinets. Leave enough room for movement, material handling, and equipment operation.
5. L-Shaped Garage Workshop Layout
An L-shaped garage workshop layout is a practical solution for garages with limited space or unusual dimensions.
It uses two connected walls to create an efficient corner workspace.
Place the workbench along the longer wall and use the shorter wall for cabinets, shelves, or specialized equipment.
The corner can accommodate additional storage or a compact workstation, depending on its dimensions.
This design works well for woodworking, household repairs, crafting, and general DIY activities.
An L-shaped layout also makes it easier to separate two activities without creating completely separate rooms.
6. Small Garage Workshop Layout Ideas
A small garage can still provide an effective workshop if the available space is used carefully.
The most important principle is to prioritize essential equipment and avoid unnecessary floor storage.
Use vertical space wherever possible. Install pegboards, wall-mounted cabinets, narrow shelves, and tool holders to keep equipment off the ground.
Consider the following ideas:
- Choose a folding or wall-mounted workbench.
- Install pegboards above the working surface.
- Use compact storage cabinets.
- Choose stackable storage containers.
- Keep power tools in organized drawers.
- Use mobile carts for flexible equipment storage.
- Store rarely used supplies on suitable overhead racks.
If your garage also needs to accommodate a vehicle, measure the parking area before installing permanent cabinets or workbenches.
A compact workshop should provide enough room to work without making everyday garage activities difficult.
7. Two-Car Garage Workshop Layout
A two-car garage offers more opportunities to create a dedicated workshop while maintaining vehicle parking.
Depending on the garage dimensions, you can reserve one side for workshop activities and use the other side for parking.
A practical arrangement includes a long workbench along the back wall, storage cabinets along one side, and a separate equipment area near the opposite wall.
If you regularly work on vehicles, consider a mobile tool chest that can be moved closer to the vehicle when needed.
For a more dedicated workshop, you can use one parking bay as the primary work area and keep the second bay available for vehicle access or additional projects.
Remember to account for vehicle doors, walking clearance, and the garage door’s operating space.
8. Woodworking Garage Workshop Layout
A woodworking workshop requires careful planning because cutting, sanding, assembling, and finishing materials can take up considerable space.
The layout should support a logical workflow, allowing wood to move from storage to preparation, cutting, assembly, and finishing without unnecessary movement.
A useful woodworking layout includes:
Lumber storage area: Store boards, plywood, and other materials in suitable vertical or horizontal racks.
Cutting station: Place the table saw, miter saw, or other cutting equipment where long materials can be handled safely.
Assembly station: Use a sturdy workbench with sufficient room for clamps and larger projects.
Tool storage: Keep measuring tools, hand tools, drill bits, and accessories close to the main work area.
Sanding and finishing area: Provide appropriate ventilation and keep finishing products stored according to their safety instructions.
Avoid placing machinery too close together. Each machine needs adequate operating clearance and space to handle materials safely.
9. Automotive Garage Workshop Layout
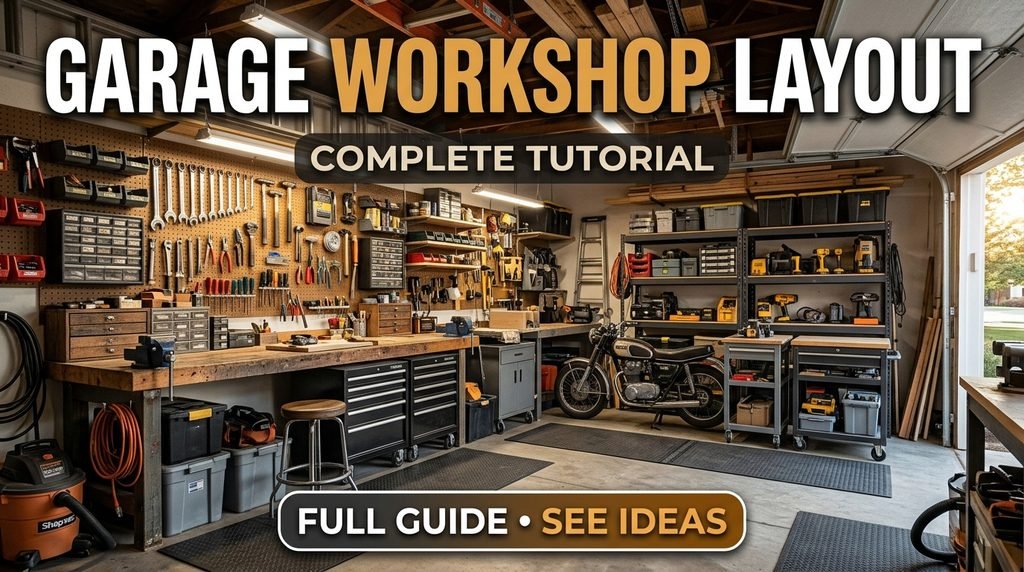
An automotive garage workshop needs enough room for vehicle access, maintenance equipment, and organized tool storage.
Start by identifying the main vehicle working area. Make sure the garage door opens fully and that there is sufficient space to walk around the vehicle.
Place a rolling tool chest near the main maintenance area so tools can be moved wherever they are needed.
Install cabinets along the walls for automotive supplies, spare parts, cleaning equipment, and accessories.
A useful automotive workshop setup includes:
- A dedicated parking and repair bay
- A rolling tool chest
- Wall-mounted storage for hand tools
- Shelves for automotive accessories
- A suitable workbench
- Proper task lighting
- Organized storage for fluids and lubricants
If you plan to use a vehicle lift, jack stands, or other lifting equipment, the floor, ceiling height, and installation requirements must be assessed carefully. Vehicle lifting equipment should be installed and used according to manufacturer specifications.
Never work underneath a vehicle supported only by a jack.
10. Place the Workbench in the Right Location
The workbench is often the most important part of a garage workshop.
Its location should provide convenient access to tools, adequate lighting, and enough room to complete projects.
A workbench positioned against the back wall is a common choice because it keeps the center of the garage open.
However, some workshops benefit from a freestanding workbench, particularly when projects require access from multiple sides.
Consider these factors when selecting its position:
- Distance from storage cabinets
- Available natural and artificial lighting
- Electrical outlet access
- Working clearance
- Material handling space
- Equipment placement
Avoid placing the workbench directly in front of windows or doors that need regular access.
11. Design an Efficient Tool Storage Wall
A dedicated tool storage wall can improve the appearance and functionality of your garage workshop.
Use a combination of pegboards, shelves, cabinets, magnetic holders, and drawer organizers.
Arrange frequently used tools near the workbench and store specialized equipment in cabinets.
For example, keep screwdrivers, pliers, hammers, and measuring tools on a pegboard. Store power tools in a cabinet and place small hardware in labeled drawers.
A well-designed tool wall should make it easy to identify, access, and return every item.
Avoid placing heavy tools on weak hooks or unsuitable wall-mounted storage systems. Secure storage equipment to appropriate structural supports and follow its load limits.
12. Include a Dedicated Power Tool Station
Power tools should have a specific location instead of being scattered around the garage.
Create a station with shelves or drawers for drills, sanders, circular saws, grinders, and other equipment.
Keep batteries, chargers, and accessories together in an organized section.
A charging station can be installed near a suitable electrical outlet. Keep charging equipment away from water, excessive heat, combustible materials, and areas where it could be damaged.
Use cable management accessories to prevent loose cords from creating obstacles.
13. Add Mobile Workstations and Rolling Carts
Rolling carts provide flexibility in a garage workshop because they allow tools and supplies to move between different work areas.
A mobile cart can hold power tools, automotive equipment, woodworking accessories, or cleaning products.
Choose a cart with strong shelves and locking wheels.
You can also use a mobile workbench if you frequently change your workshop arrangement.
When the equipment is not being used, move the cart to a designated parking position so it does not block walkways.
14. Improve Lighting in Your Garage Workshop
Lighting should be considered an essential part of the workshop layout.
Install overhead LED lighting to illuminate the general workspace. Add task lighting above the workbench and near machines where accurate visibility is important.
If your garage has windows, use natural light where practical, but do not depend on it as your only source of illumination.
Good lighting helps you measure accurately, inspect materials, and identify potential hazards.
Make sure electrical installations are suitable for the workshop environment and completed safely.
15. Plan Electrical Outlets and Ventilation
A functional garage workshop needs suitable electrical access and ventilation.
Before finalizing the layout, identify where electrical outlets are located and determine whether additional outlets are required.
Avoid relying on long extension cords across walking paths. Electrical upgrades should be performed by a qualified electrician.
Ventilation is particularly important when using paints, solvents, adhesives, finishes, or equipment that produces dust and fumes.
Consider suitable extraction systems for woodworking dust and other workshop processes. Use the appropriate protective equipment for each task.
Never assume that simply opening the garage door provides adequate ventilation for every chemical or workshop activity.
Storage cabinets can help create a clean and professional-looking workshop.
Install cabinets along unused walls or beneath the workbench.
Use different cabinet sizes for hand tools, power tools, materials, and accessories.
Tall cabinets are useful for long equipment and bulky supplies, while drawer cabinets are ideal for small tools and hardware.
Choose durable cabinets that suit the weight and type of items being stored.
Keep heavy equipment on lower shelves and secure tall cabinets to prevent tipping.
17. Budget-Friendly Garage Workshop Layout
You do not need a large budget to create a practical workshop.
Start by reorganizing existing equipment and removing items that are no longer useful.
Use affordable pegboards, wall hooks, recycled containers, and basic shelving to create an organized workspace.
A simple DIY workbench can provide a useful working surface without the expense of a custom workstation.
Focus on improvements that solve specific problems instead of purchasing storage products simply because they look attractive.
Budget-Friendly Layout Improvements
| Improvement | Main Benefit |
|---|---|
| DIY pegboard | Keeps hand tools visible |
| Wall-mounted shelves | Frees up floor space |
| Recycled storage bins | Organizes small supplies |
| Homemade workbench | Provides an affordable work surface |
| Magnetic tool holders | Stores suitable metal tools |
| Rolling utility cart | Provides flexible storage |
| Printed labels | Makes equipment easier to locate |
18. Professional Garage Workshop Layout
A professional-style garage workshop focuses on efficiency, durability, and organized work zones.
It may include heavy-duty workbenches, modular cabinets, specialized tool storage, dedicated machinery areas, and suitable dust extraction.
Instead of placing all equipment wherever space is available, arrange it according to the workflow of your projects.
For example, a woodworking workshop may have separate cutting, assembly, sanding, and finishing stations.
An automotive workshop may have a dedicated vehicle bay, diagnostic equipment area, tool storage, and parts cabinets.
Professional layouts should also account for equipment clearances, electrical capacity, ventilation, fire protection, and safe access to emergency exits.
19. Common Garage Workshop Layout Mistakes
Even a spacious garage can become difficult to use when the layout is poorly planned.
Ignoring measurements: Always measure the garage and equipment before installing permanent storage or machinery.
Blocking the center area: Avoid filling the garage with unnecessary cabinets and equipment that restrict movement.
Poor workbench placement: A workbench without proper lighting or tool access can make projects unnecessarily difficult.
Mixing different activities: Keeping woodworking, automotive, and general repair supplies together can create clutter. Separate them into suitable zones.
Ignoring machine clearance: Tools such as table saws and drill presses need enough room for safe operation and material handling.
Using unsuitable overhead storage: Never exceed the load capacity of ceiling racks or install them without proper structural support.
Forgetting future needs: Leave some flexibility for additional tools and equipment as your workshop develops.
20. How to Create Your Ideal Garage Workshop Layout
The best way to create an efficient garage workshop is to follow a step-by-step planning process.
- Measure the garage and prepare a basic floor plan.
- Identify your main workshop activities.
- List the equipment and storage you need.
- Divide the space into functional work zones.
- Choose the most suitable layout, such as single-wall, L-shaped, U-shaped, or two-wall.
- Position the workbench and large equipment.
- Plan storage cabinets, shelves, and pegboards.
- Check electrical access, lighting, and ventilation.
- Maintain clear walkways and safe working distances.
- Test the arrangement and adjust it as needed.
You can begin with basic storage and gradually upgrade the workshop as your requirements change.
Conclusion
A well-designed garage workshop layout makes everyday projects easier, improves organization, and helps you use available space more effectively. Whether you have a compact single-car garage or a spacious two-car garage, the right arrangement can provide a comfortable place for woodworking, automotive repairs, DIY activities, and general maintenance.
Start by measuring your garage, identifying your most important activities, and choosing a layout that suits your working habits. Use vertical storage, organize tools into dedicated zones, position the workbench carefully, and provide sufficient lighting and ventilation.
The goal is not simply to fit more equipment into your garage. It is to create a practical workshop where everything has a purpose, tools are easy to reach, and projects can be completed safely and efficiently.
Frequently Asked Questions
1. What is the best layout for a garage workshop?
The best layout depends on your garage size and activities. A single-wall layout works well for small garages, an L-shaped layout is useful for corner workspaces, and a U-shaped layout provides multiple workstations in larger garages.
2. How do I plan a garage workshop layout?
Measure your garage, identify your main activities, list your equipment, and divide the space into functional zones. Plan the workbench, tool storage, machinery, electrical outlets, and walking paths before installing anything.
3. How much space do I need for a garage workshop?
The space required depends on the type of work you perform. A small DIY workshop can fit along one wall, while woodworking and automotive workshops generally require more floor space for equipment and material handling.
4. What is the best workbench placement in a garage?
A workbench against the back wall is a popular option because it keeps the center area open. A freestanding workbench can be useful when you need access from multiple sides.
5. How do I organize a small garage workshop?
Use vertical storage, wall-mounted cabinets, pegboards, folding workbenches, and compact shelving. Keep the floor clear and use mobile carts for equipment that needs to move between work areas.
6. What is the best layout for a woodworking garage workshop?
A woodworking layout should include separate areas for lumber storage, cutting, assembly, sanding, and finishing. Arrange equipment according to the order in which materials move through your projects.
7. Can I have a workshop and park my car in the same garage?
Yes. You can use one side or the back wall for a workshop while keeping the remaining space available for parking. Measure vehicle clearance and make sure tools and equipment do not interfere with vehicle movement.
8. What should be included in a garage workshop?
A practical garage workshop should include a sturdy workbench, suitable hand and power tools, organized storage, good lighting, electrical outlets, cleaning supplies, and appropriate safety equipment.
9. How do I make a garage workshop look professional?
Use coordinated storage cabinets, organized tool walls, labeled drawers, suitable lighting, and clean work surfaces. Separate different activities into dedicated zones and keep unnecessary items out of the workspace.
10. Should a garage workshop have a U-shaped or L-shaped layout?
An L-shaped layout is suitable for smaller and medium-sized workshops that need two connected work areas. A U-shaped layout works better in larger spaces where you want storage and workstations along three walls.
11. Where should I put power tools in a garage workshop?
Place frequently used power tools near the main workbench or in a dedicated tool station. Store accessories and batteries together, and keep equipment protected from moisture and excessive dust.
12. How can I make my garage workshop safer?
Maintain clear walkways, provide suitable lighting and ventilation, secure cabinets and shelves, store chemicals correctly, and use appropriate protective equipment. Follow manufacturer instructions for machinery and electrical equipment.