
Aquariums are a beautiful centerpiece in any home, providing a thriving habitat for aquatic life and a calming display of underwater beauty. However, like any glass or acrylic container, aquariums are prone to wear and tear over time. One of the most common issues aquarium owners face is leakage, which often requires aquarium resealing.
Resealing an aquarium is the process of removing and replacing the inner silicone seals that keep the tank watertight. While this task might sound intimidating, it is entirely manageable with the right tools, patience, and proper guidance. In this article, we’ll cover everything you need to know about aquarium resealing, from why it’s necessary to how to do it step by step, along with expert tips and FAQs at the end.
Why Aquarium Resealing Is Necessary
Aquarium resealing becomes essential when the silicone seals inside the tank start deteriorating. Over time, exposure to water, pressure, algae, cleaning chemicals, and general wear can cause silicone to weaken. This leads to slow leaks or complete seal failure.
Here are the main reasons you may need to reseal your aquarium:
- Leakage: The most obvious sign is water leaking from the corners or edges. Even small leaks can lead to bigger problems if not fixed.
- Aging Silicone: Silicone naturally degrades after several years. If your tank is 8–10 years old or older, resealing may be required.
- Visible Damage: Cracks, peeling, or bubbles in the silicone seal are strong indicators.
- Preventive Maintenance: Some aquarists choose to reseal tanks as a precaution before setting up expensive aquascapes or keeping rare fish.
Signs Your Aquarium Needs Resealing
Wondering how to tell if it’s time to reseal your aquarium? Watch out for these signs:
- Damp Spots Around the Tank – Moisture near seams or on the stand often indicates small leaks.
- Algae or Dirt Trapped in Silicone – If debris is stuck under peeling silicone, it’s time to fix it.
- Bubbles in the Seals – Air pockets in silicone weaken the structure and eventually lead to leaks.
- Soft or Loose Seals – Silicone that feels gummy, soft, or comes off easily needs replacement.
- Water Level Drop Without Evaporation – If water levels decrease faster than expected, it could be leakage rather than evaporation.
Tools and Materials Needed for Aquarium Resealing
Before you begin resealing, gather the following items:
- Aquarium-safe silicone sealant (100% silicone, no additives, labeled safe for aquariums)
- Razor blades or utility knife (for removing old silicone)
- Isopropyl alcohol (to clean glass surfaces)
- Painter’s tape or masking tape (to create clean silicone lines)
- Paper towels and rags (for cleaning and wiping excess silicone)
- Gloves (to protect your hands from cuts and chemicals)
- Caulking gun (if using silicone cartridges)
Optional but helpful:
- Plastic scrapers (to avoid scratching glass)
- Clamps (to hold panels in place if needed)
Step-by-Step Guide to Aquarium Resealing
Resealing an aquarium is a careful process. Here’s a detailed guide:
Step 1: Drain and Prepare the Tank
- Move your fish to a safe temporary tank or container with proper aeration and heating.
- Drain the aquarium completely and dry it.
- Remove decorations, substrate, and equipment.
Step 2: Remove the Old Silicone
- Use a razor blade to carefully cut away all visible silicone inside the seams.
- Do not separate the glass panels unless you are rebuilding the entire aquarium. Resealing only requires removing the inner seal.
- Make sure no residue is left behind.
Step 3: Clean the Glass
- Wipe down all seams with isopropyl alcohol to ensure a completely clean, oil-free surface.
- Allow the tank to dry fully before applying new silicone.
Step 4: Tape the Seams
- Apply painter’s tape along the edges of each seam. This helps create a clean finish and prevents silicone smears on the glass.
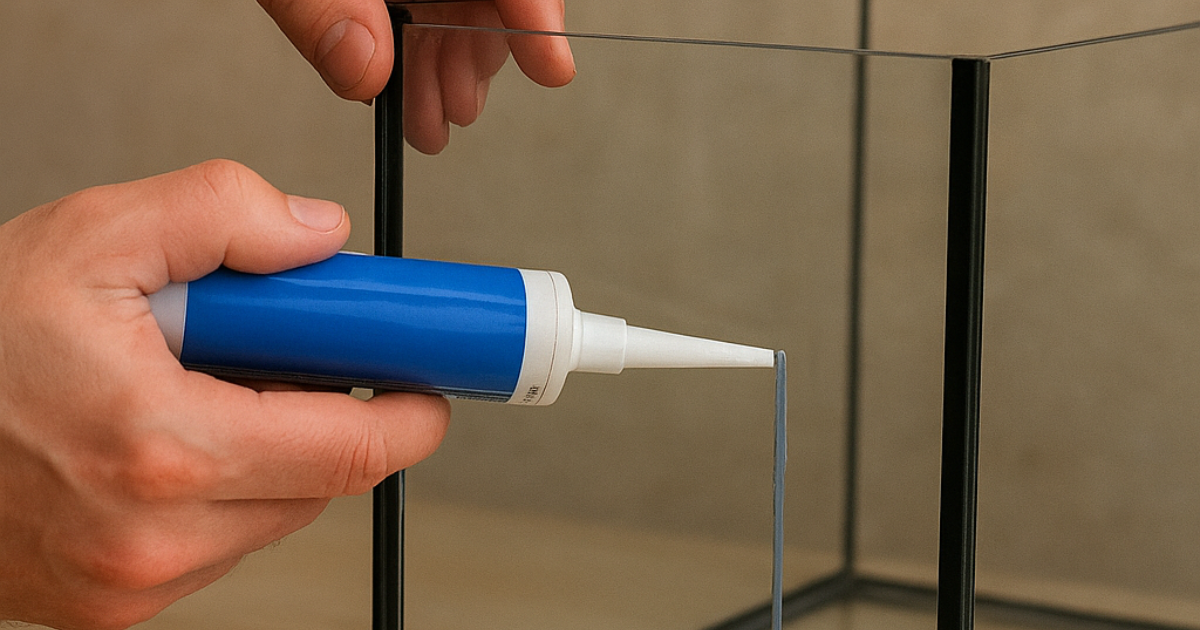
Step 5: Apply Aquarium Silicone
- Cut the tip of the silicone tube at a 45° angle.
- Apply a continuous bead of silicone along each seam.
- Smooth the bead with a gloved finger or silicone tool for even coverage.
- Remove painter’s tape immediately after smoothing for clean edges.
Step 6: Curing Time
- Allow the silicone to cure for at least 24–48 hours (check manufacturer’s instructions).
- Ensure the aquarium is in a dust-free environment while curing.
Step 7: Leak Testing
- Place the resealed aquarium in a safe area (like a garage or outside).
- Fill the tank with water and let it sit for 24 hours.
- Check for any leaks before reintroducing fish.
Common Mistakes to Avoid During Aquarium Resealing
- Using the Wrong Silicone: Regular silicone with additives can harm fish. Always choose aquarium-safe silicone.
- Not Removing All Old Silicone: New silicone won’t stick properly if traces of old silicone remain.
- Rushing the Cure Time: Incomplete curing can cause leaks or harm fish.
- Overapplying Silicone: Thick, messy silicone looks bad and doesn’t seal better than a smooth, even layer.
- Resealing With Fish Inside: Never attempt resealing without moving your aquatic life first.
How Often Should You Reseal an Aquarium?
There isn’t a fixed timeline, but most aquariums last 7–10 years before resealing is needed. High-pressure tanks (like tall aquariums) may need it sooner. Regular inspections of the silicone seals can help determine when maintenance is required.
Professional Aquarium Resealing vs DIY
- DIY Resealing: Cost-effective, satisfying, and doable for most hobbyists with patience. However, mistakes can lead to leaks.
- Professional Resealing: More expensive but offers peace of mind, especially for large or custom aquariums.
Cost of Aquarium Resealing
The cost depends on the tank size and whether you do it yourself or hire a professional:
- DIY Resealing: $15–$50 (mainly for silicone and tools).
- Professional Resealing: $100–$500 depending on size and labor.
Tips to Extend the Life of Your Resealed Aquarium
- Place the aquarium on a level and sturdy stand to prevent uneven stress.
- Avoid using harsh cleaning chemicals on silicone seams.
- Regularly inspect seals for signs of wear.
- Maintain proper water conditions to prevent algae buildup on seals.
Conclusion
Aquarium resealing may sound like a daunting task, but it’s one of the most valuable skills an aquarist can learn. Whether your tank is leaking or you’re performing preventive maintenance, resealing ensures the safety of your fish and the longevity of your aquarium. By using the right materials, following proper steps, and taking the time to test your work, you can restore your tank to a leak-free and reliable condition.
FAQs About Aquarium Resealing
Q1: How long does aquarium resealing last?
A properly resealed aquarium can last another 7–10 years if maintained correctly.
Q2: Can I use regular silicone for aquarium resealing?
No, only 100% aquarium-safe silicone should be used. Other types may contain additives harmful to fish.
Q3: How long should I wait before refilling the tank after resealing?
Wait at least 24–48 hours for curing. Some silicones may require up to 72 hours.
Q4: Do I need to reseal the entire tank if there’s only a small leak?
Yes, it’s best to reseal the whole interior to ensure long-term safety. Fixing just one spot may lead to future leaks elsewhere.
Q5: Can large aquariums be resealed at home?
Yes, but larger tanks are more challenging. If you’re unsure, hiring a professional is safer.
Q6: How do I know if my reseal was successful?
Perform a 24-hour water test in a safe area. If no leaks occur, the reseal was successful.
Q7: Is resealing worth it, or should I buy a new tank?
It depends on the tank size and value. Small, cheap tanks may not be worth resealing, but large or custom aquariums are often worth the effort.