
Driftwood has long been a favorite among aquarists, aquascapers, and aquarium hobbyists due to its natural beauty and practical benefits. It adds a rustic, earthy look to your aquarium, provides shelter for fish, and helps maintain a balanced ecosystem. However, not all driftwood is ready to use straight away. Improperly prepared driftwood can release tannins, alter pH levels, or even introduce harmful bacteria and pests into your tank.
That’s where driftwood preparation comes in. Preparing driftwood correctly ensures it’s safe, clean, and aquarium-ready. This guide covers everything you need to know — from choosing the right type of driftwood to cleaning, curing, boiling, and soaking it — to ensure your aquarium stays beautiful and healthy.
What Is Driftwood?
Driftwood refers to wood pieces that have been naturally weathered by water, sun, and time. It can come from rivers, lakes, or oceans and often takes on unique shapes and textures due to the erosion process.
In aquariums, driftwood is used both for aesthetic appeal and functional benefits. It helps mimic the natural environment of many freshwater fish species, such as tetras, cichlids, and catfish, while providing essential hiding spots and surfaces for beneficial bacteria to grow.
Why Driftwood Preparation Is Important
Before placing driftwood into your aquarium, preparation is essential for several reasons:
1. Removes Dirt and Debris
Natural driftwood often contains dirt, moss, fungus, or insects. Cleaning eliminates contaminants that could harm your aquarium’s ecosystem.
2. Prevents Tannins Overload
Driftwood releases tannins — natural compounds that tint water brown. While some tannins are beneficial, excessive amounts can lower pH and discolor your water.
3. Kills Harmful Organisms
Boiling or baking driftwood sterilizes it, removing parasites, bacteria, or fungi that might infect fish.
4. Increases Sinkability
Dry wood tends to float. Soaking and curing the wood helps it absorb water and sink naturally.
5. Maintains Stable Water Chemistry
Proper preparation ensures driftwood doesn’t drastically alter your aquarium’s pH or hardness, keeping your aquatic life safe.
Types of Driftwood for Aquariums
Not all driftwood types are suitable for aquarium use. Some release excessive tannins or rot too quickly. Below are some of the best types of aquarium-safe driftwood:
1. Malaysian Driftwood
Dense and dark in color, Malaysian driftwood sinks easily and adds a rich, natural tone to aquariums. It’s perfect for creating a jungle-like aquascape.
2. Mopani Wood
A beautiful two-tone wood that’s heavy and sinks easily. It releases more tannins than others but is excellent for cichlid tanks.
3. Spider Wood
Named for its twisted, root-like structure, spider wood adds a dramatic aesthetic. However, it takes time to sink and may require extra soaking.
4. Cholla Wood
Lightweight and porous, cholla wood is ideal for shrimp tanks as it provides hiding spots and biofilm surfaces.
5. Manzanita Wood
Smooth and branchy, manzanita wood is popular for aquascaping due to its elegant structure and minimal tannin release.
6. Bogwood
Naturally aged and dense, bogwood is often used for natural-looking aquariums and blackwater setups.
7. African Root Wood
Hard and durable, it lasts long and provides a rugged texture for larger tanks and cichlid habitats.
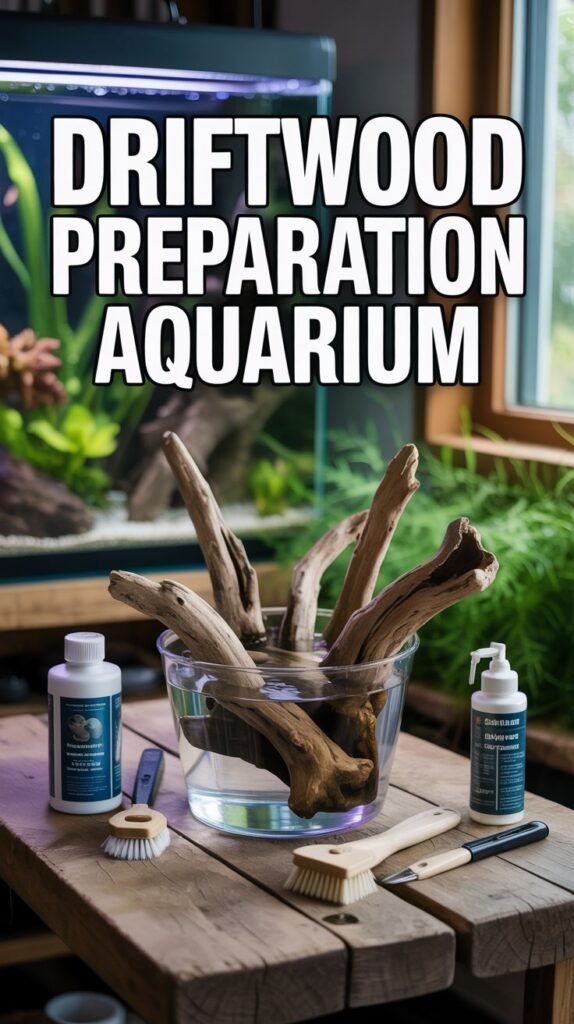
Step-by-Step Driftwood Preparation Process

Preparing driftwood properly involves several steps to ensure it’s safe, clean, and aquarium-ready. Let’s break down the process step-by-step.
Step 1: Selecting the Right Driftwood
If you’re collecting driftwood from nature, make sure it’s from clean, freshwater sources — never from saltwater beaches, as salt residues can harm freshwater fish. Avoid rotting, spongy, or moldy pieces.
Checklist for choosing driftwood:
- Hard and solid (not crumbly)
- No mold or soft spots
- Free from sharp edges
- Sufficient size for your aquarium
Step 2: Cleaning and Brushing
After selecting your driftwood, start by cleaning it thoroughly.
Procedure:
- Rinse under running water.
- Scrub the surface with a stiff brush to remove dirt, algae, or bark.
- Avoid using soaps or detergents — they leave harmful residues.
- For heavily soiled wood, soak in freshwater for 24 hours and scrub again.
This initial cleaning removes debris, insects, and surface contaminants.
Step 3: Removing Bark (Optional but Recommended)
Bark tends to decay faster and may harbor pests or mold. Removing it ensures your driftwood lasts longer and stays cleaner in your tank.
Tip: Use a knife or chisel to carefully peel off bark layers. If it’s too hard, soaking the wood for a few hours first will make it easier.
Step 4: Boiling the Driftwood
Boiling is one of the most effective steps in driftwood preparation. It kills pathogens, removes tannins, and helps the wood absorb water to sink faster.
Boiling process:
- Place the driftwood in a large pot or container.
- Boil for 1–2 hours (for small pieces) or up to 4 hours (for large pieces).
- If the wood doesn’t fit completely, rotate and boil in sections.
- Change water every hour to remove tannins.
After boiling, the wood will appear darker and waterlogged — that’s a good sign.
Step 5: Baking the Driftwood (Alternative to Boiling)
If boiling isn’t feasible, baking is another sterilization method.
Instructions:
- Preheat oven to 200°F (93°C).
- Place driftwood on a foil-lined tray.
- Bake for 2–3 hours, turning occasionally.
Caution: Never bake wet wood at high temperatures — it can crack or smoke. Always keep the temperature low.
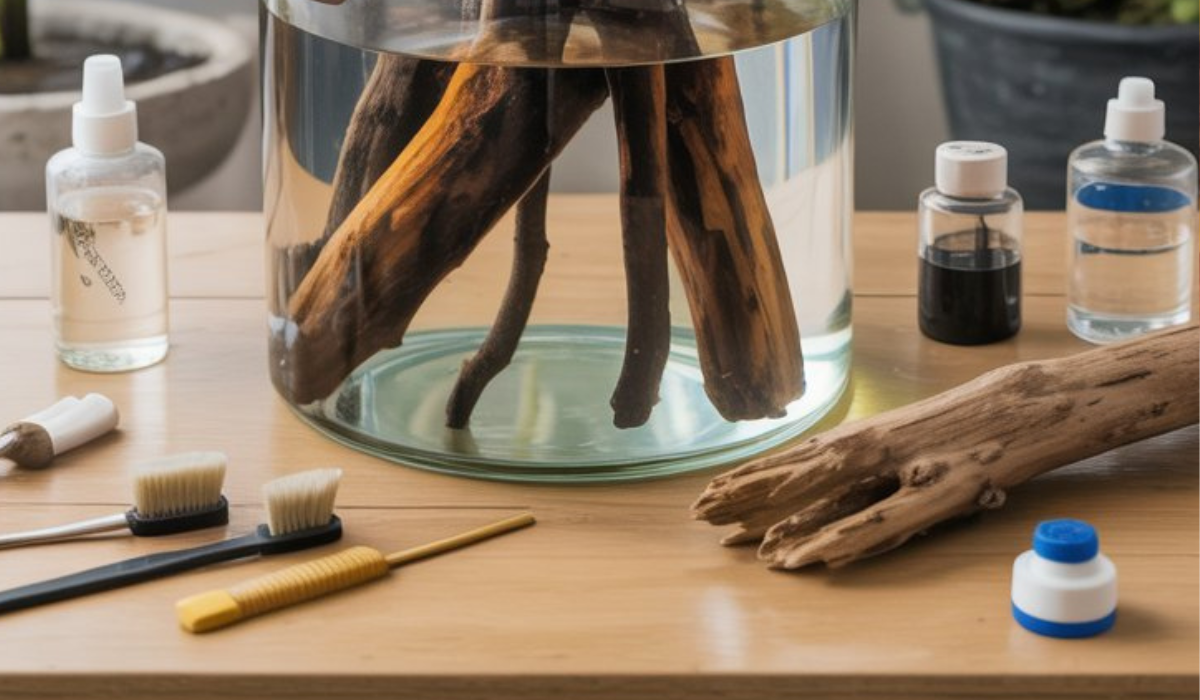
Step 6: Soaking and Curing
After boiling or baking, driftwood should be soaked for several days to weeks to release remaining tannins and ensure it sinks.
Soaking steps:
- Submerge the driftwood completely in a large container or bucket.
- Use rocks to weigh it down if it floats.
- Change the water daily to reduce tannin concentration.
- Continue until water stays mostly clear (typically 1–3 weeks).
Note: If you prefer a “blackwater aquarium,” you can stop soaking earlier to retain some tannins for natural coloration.
Step 7: Testing Driftwood Before Adding to Aquarium
Before introducing driftwood to your aquarium:
- Place it in a bucket of freshwater for 24 hours.
- Check the water’s pH and color.
- If the water remains stable and clear, it’s safe for tank use.
How to Make Driftwood Sink Faster
Some driftwood types, like spider or manzanita wood, are naturally buoyant. To make them sink faster:
- Boil longer: Helps wood absorb water quickly.
- Soak in hot water: Accelerates saturation.
- Attach weights: Use aquarium-safe rocks or stainless-steel screws.
- Anchor to substrate: Bury the base in gravel or sand.
After a few weeks, the wood will stay submerged on its own.
Driftwood and Water Chemistry
Driftwood slightly alters your aquarium’s water parameters — often for the better.
1. pH Reduction
Tannins released by driftwood lower pH, making the water softer and more acidic. This benefits fish species from blackwater habitats like tetras, bettas, and angelfish.
2. Antibacterial Properties
Tannins have mild antibacterial and antifungal effects, improving overall fish health.
3. Natural Coloring
The tea-like tint from tannins creates a realistic “river” appearance that many aquarists find attractive.
Tip: If you prefer crystal-clear water, use activated carbon or Purigen in your filter to remove excess tannins.
Aesthetic and Biological Benefits of Driftwood
Driftwood is not just decoration — it’s an essential part of many natural aquariums.
1. Enhances Aquascaping
Driftwood adds structure, depth, and visual interest to aquariums. It can serve as a focal point or framework for mosses, ferns, and epiphytes.
2. Provides Shelter
Many fish and invertebrates use driftwood as hiding spots, helping reduce stress and territorial aggression.
3. Promotes Beneficial Bacteria Growth
The porous surface of driftwood serves as a habitat for nitrifying bacteria, aiding in biological filtration.
4. Food Source for Certain Species
Some fish and shrimp, like plecos, raspberries, and shrimp, graze on biofilm and algae that naturally grow on driftwood surfaces.
Maintaining Driftwood in the Aquarium
Even after preparation, driftwood needs regular maintenance to keep your aquarium clean and healthy.
1. Regular Cleaning
- Scrub off algae buildup every few months using a soft brush.
- Avoid removing the wood unless necessary — gentle cleaning inside the tank is enough.
2. Monitor Water Parameters
- Keep an eye on pH, hardness, and water clarity.
- Replace filter media regularly to manage tannins.
3. Inspect for Decay
If driftwood becomes soft or slimy over time, it may be decomposing. Replace deteriorating pieces to maintain tank health.
4. Repositioning and Replanting
As driftwood ages, you may need to reposition it or reattach plants like Anubias, Java Fern, or Moss using thread or glue.
Common Mistakes to Avoid During Driftwood Preparation
- Skipping Boiling or Soaking
- Leads to tannin overload and floating issues.
- Using Chemical Cleaners
- Soap or bleach can kill fish even in tiny traces.
- Rushing the Curing Process
- Inadequate soaking can cause unstable pH and cloudy water.
- Using Soft or Rotten Wood
- Such pieces break down quickly and pollute water.
- Adding Driftwood Without Testing
- Always check pH and color changes before tank placement.
DIY Driftwood Preparation Tips
- Use rainwater or dechlorinated tap water for soaking.
- Weigh down light pieces using stainless-steel screws or aquarium stones.
- Combine with plants like Java Fern or Buchephalandra for a natural aesthetic.
- Label containers when curing multiple wood pieces to track progress.
Advantages of Properly Prepared Driftwood
- Enhances natural beauty of aquariums.
- Provides shelter and comfort for fish.
- Improves biological balance through bacterial colonization.
- Adds natural tannins beneficial for soft-water fish.
- Prevents introduction of harmful organisms.
- Ensures stable water conditions and longer-lasting decor.
Conclusion
Driftwood can completely transform your aquarium, giving it a beautiful, natural, and biologically balanced appearance. But before you place it into your tank, proper driftwood preparation is essential to ensure it’s clean, safe, and aquarium-friendly.
By following the steps — cleaning, boiling, soaking, and curing — you can prevent issues like floating, discoloration, or pH imbalance. Once prepared correctly, driftwood not only elevates the look of your tank but also provides countless benefits for your fish and aquatic plants.
Whether you’re building a natural aquascape or setting up a tropical environment, driftwood is the perfect element to bring life, texture, and authenticity to your aquarium — safely and beautifully.
Frequently Asked Questions (FAQs)
1. Why do I need to prepare driftwood before adding it to my aquarium?
Preparing driftwood removes tannins, dirt, and harmful organisms that can pollute the water or harm fish.
2. Can I use driftwood I found at the beach?
No. Saltwater driftwood can contain salts and minerals harmful to freshwater aquariums.
3. How long should I boil driftwood?
Boil for 1–4 hours depending on size. Larger pieces may need multiple sessions.
4. What if my driftwood still floats after soaking?
Attach weights or tie it to rocks until it becomes waterlogged and sinks naturally.
5. Is it okay if my water turns brown after adding driftwood?
Yes. That’s due to tannins, which are natural and even beneficial. You can reduce coloration with water changes or activated carbon.
6. How can I remove tannins faster?
Change soaking water daily and use hot water. Boiling also helps release tannins more quickly.
7. Can I bake driftwood instead of boiling?
Yes, baking at low temperatures (around 200°F) is an effective alternative for sterilization.
8. How long should driftwood soak before adding it to the tank?
Usually 1–3 weeks, depending on wood type and tannin levels.
9. How do I know if my driftwood is aquarium-safe?
It should be hard, non-rotting, and free from chemical treatments or soft bark.
10. Does driftwood ever rot inside aquariums?
Over time, soft wood types can decay. Hardwoods like manzanita or mopani last several years with proper maintenance.